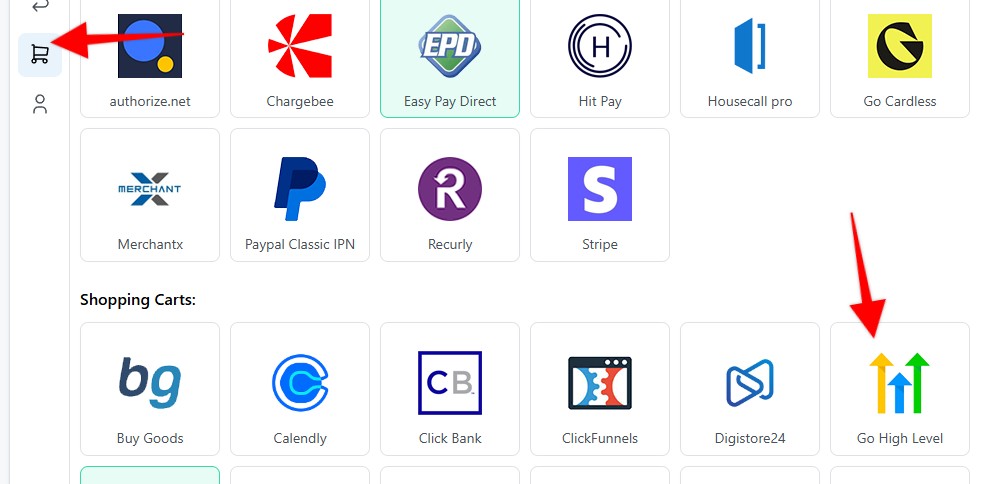
1. Set up your Webhook on the Settings page > Payment Processing and Carts > Go High Level
2. Enter a name for your Webhook > Select funnel to apply the webhook to > Hit Save & generate Webhook URL
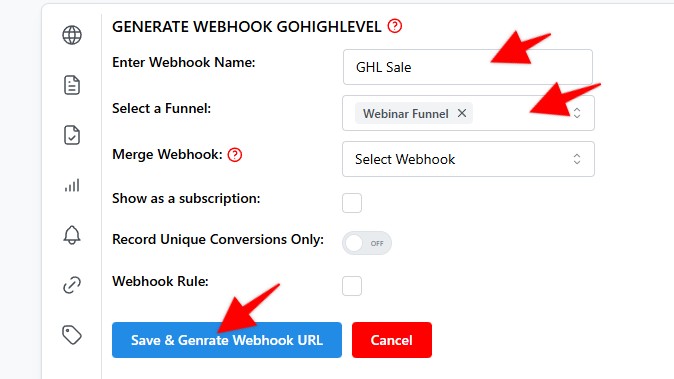
3. Copy the webhook URL, and hit Save
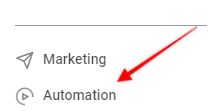
4. Log in to Go High Level and click on the Automation link in the left sidebar.
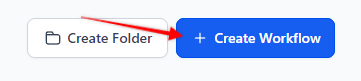
5. Click on + Create Workflow button.
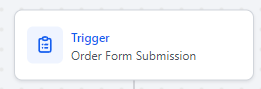
6. For the Trigger:
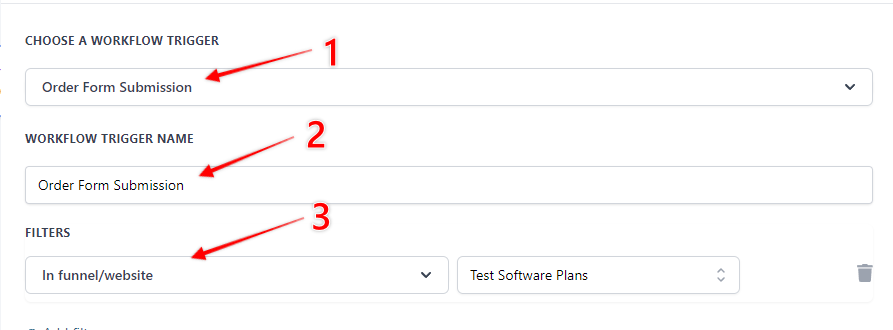
7. As the trigger set Order Form Submission (1), Enter a name for your workflow (2), and finally select funnel and page (3).
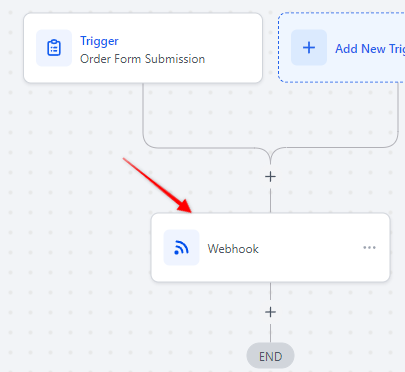
8. As an action set up the Webhook.
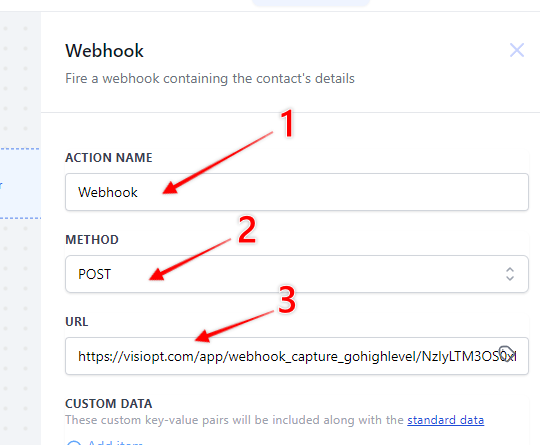
9. Enter action name (1), as a method select Post (2), in the URL field paste the url generated in step 2.
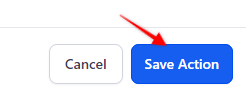
10. Click on the Save action button.
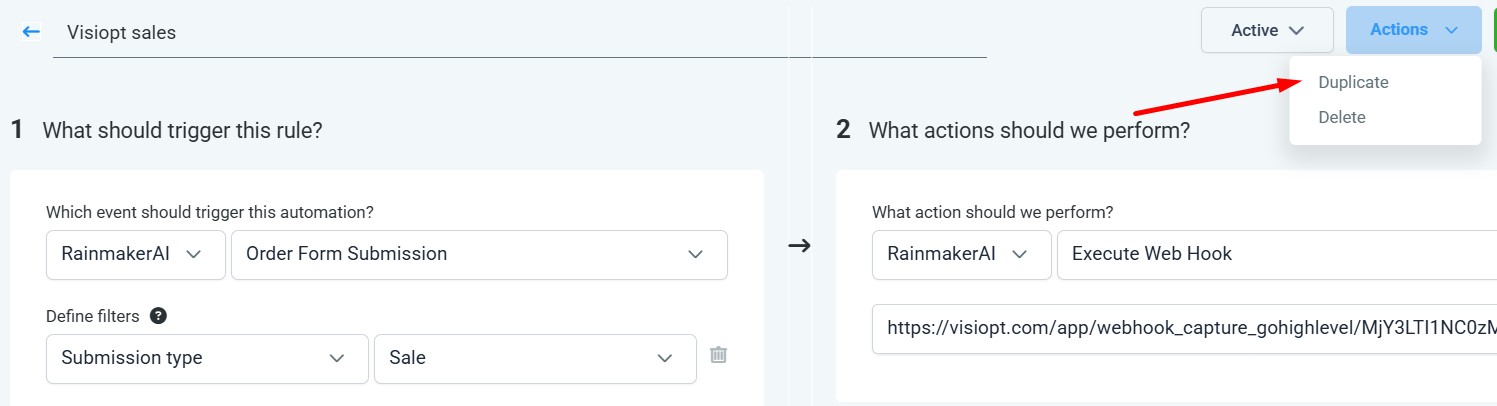
If you have upsells you must create a separate web hook to pass that revenue through.
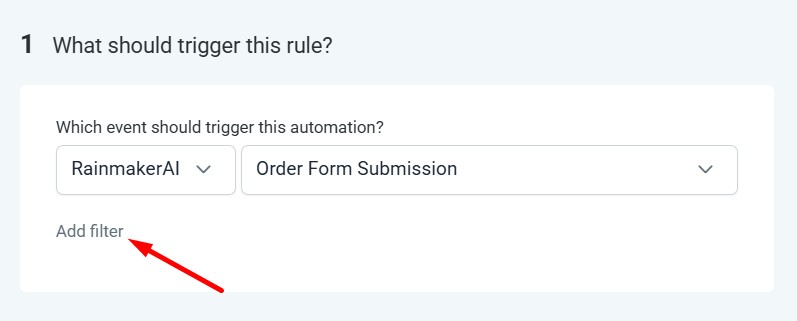
1.Go to the Trigger where you have already configured the webhook. Click on “Add Filter” under the trigger.
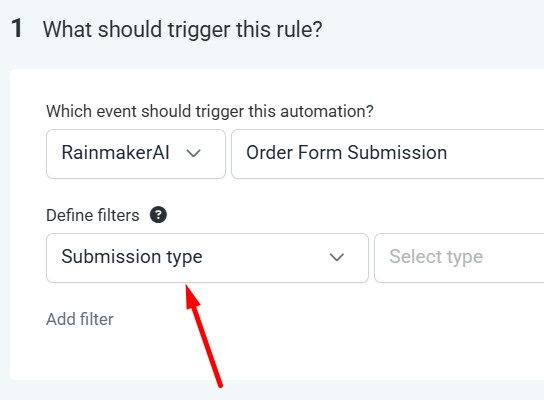
2.After clicking "Add Filter", you will see a "Define Filter" dropdown. From this dropdown, select "Submission Type".
3.In the "Select Type" dropdown next to it, select "Sale".
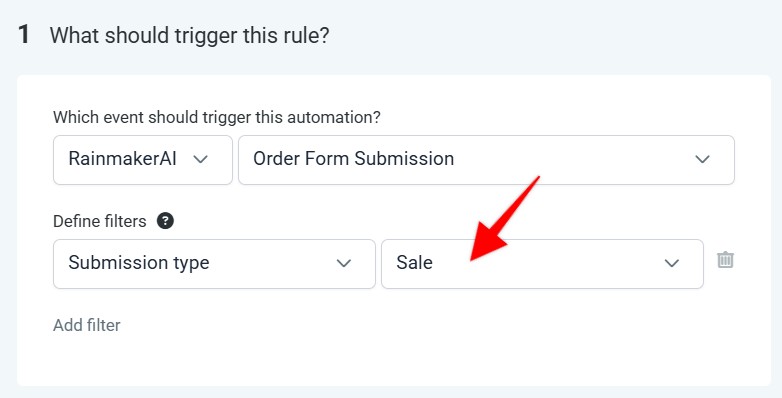
This trigger will now fire only for the Main Sale transactions, and the webhook attached to this trigger will receive main sale data only.
4.To create a webhook for Upsell, duplicate this same trigger.
5. In the duplicated trigger change "Submission Type" to "Upsell". Replace the existing webhook URL with the new Upsell webhook URL generated in VisiOpt
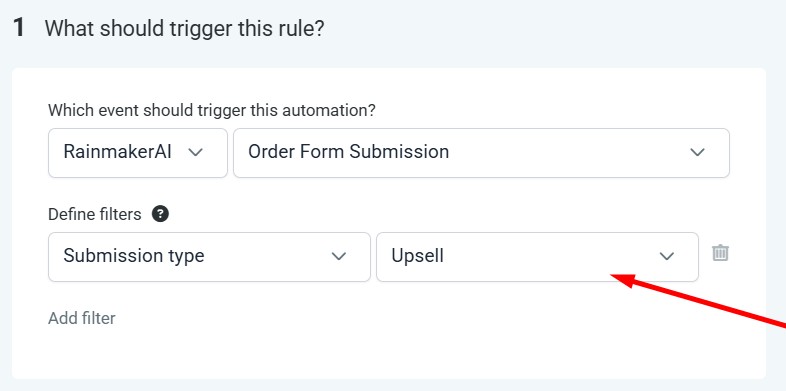
Now you have two webhooks, one for the Main sale, and one for the Upsell.
Comments
0 comments
Article is closed for comments.