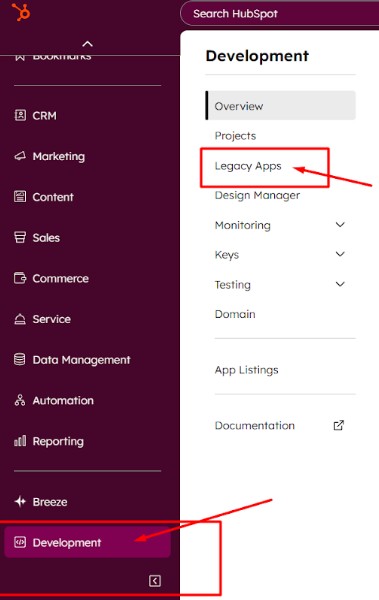
1. Log in to your HubSpot account, click the Developer icon, and select Legacy Apps from the menu.
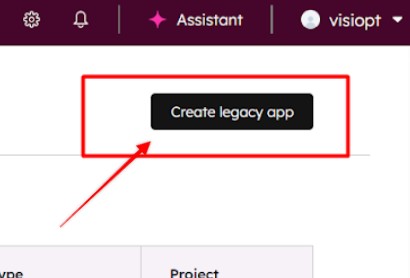
2. Click on Create Legacy App.
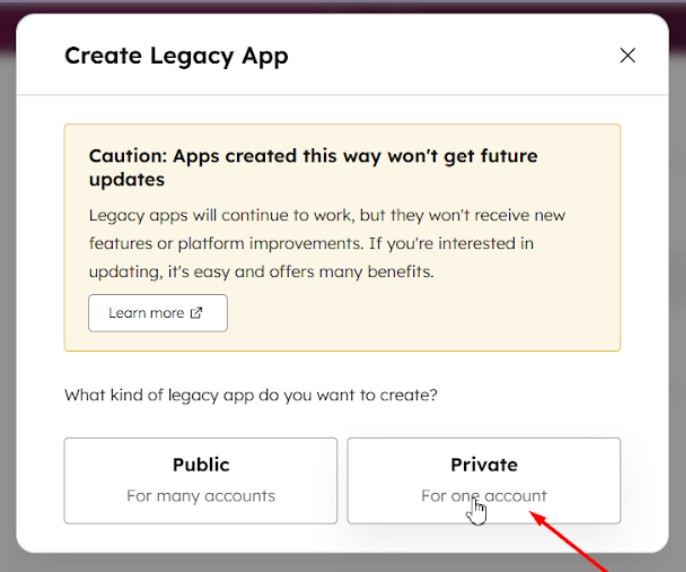
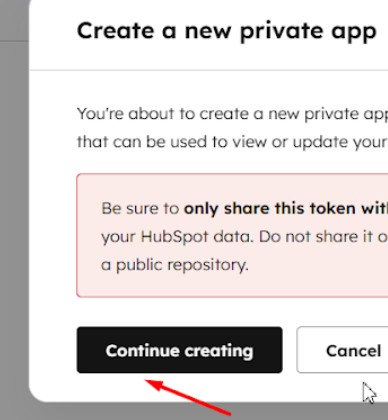
3. After clicking the button, a popup will appear — select "Private" as shown in the screenshot.
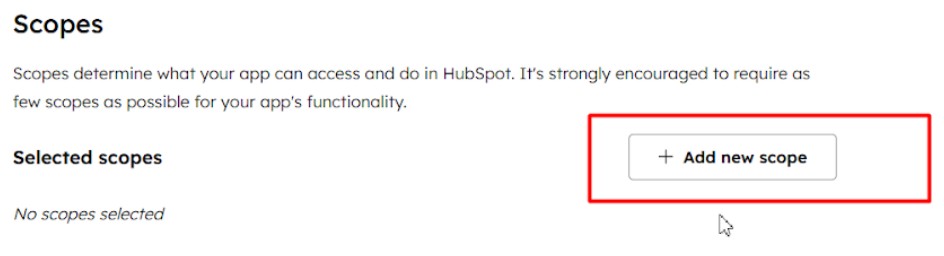
4. Enter the basic information such as App Name, Scopes, and Webhook URL to configure your legacy app. You can choose any name for the app.
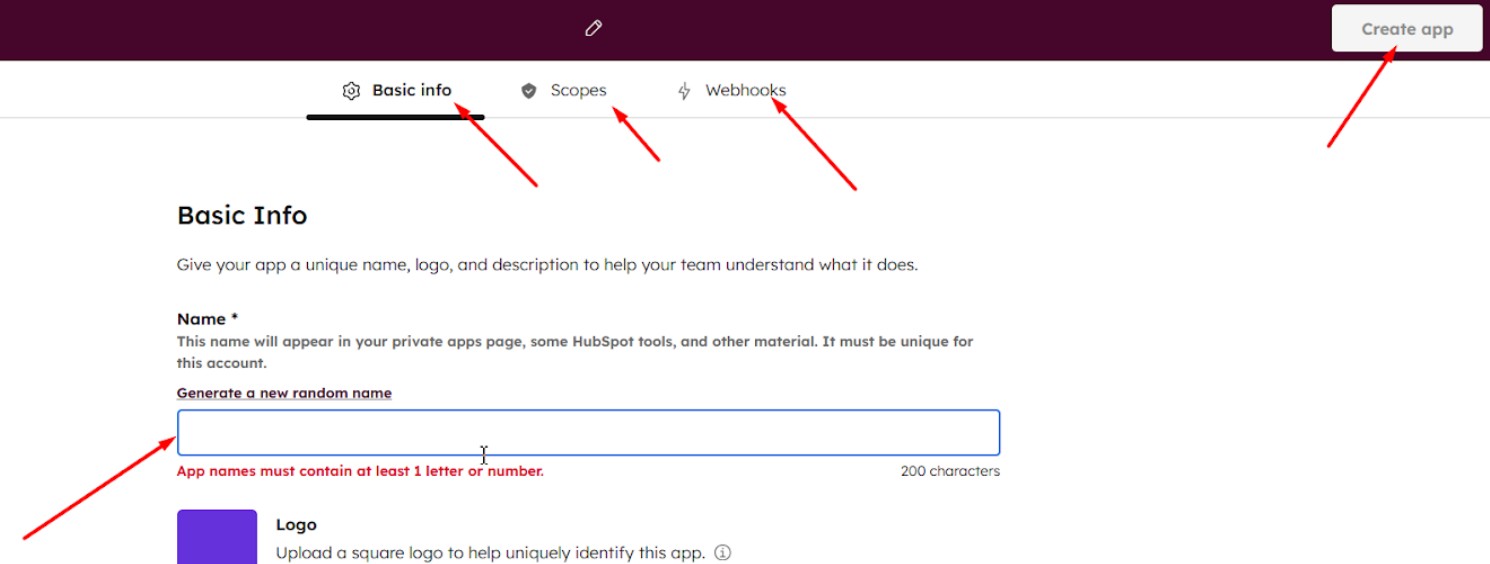
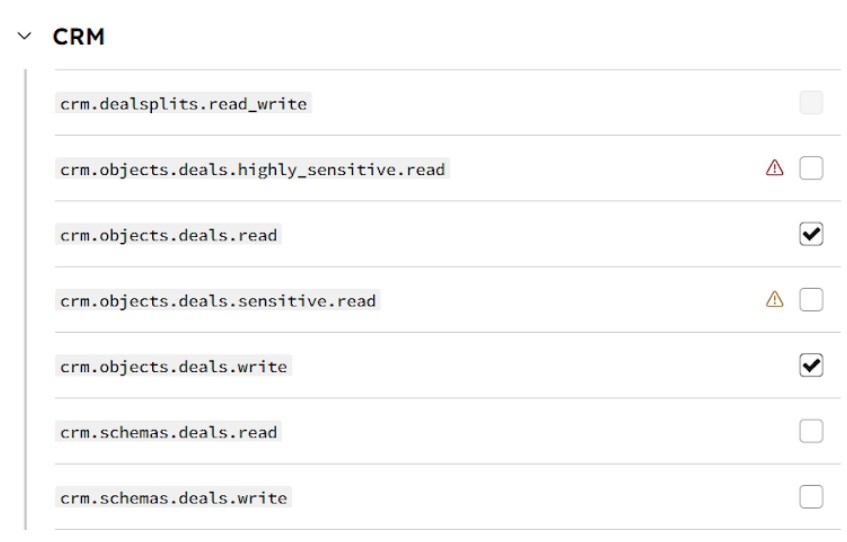
5. For scopes, select the following four options:
crm.objects.deals.read
crm.objects.deals.write
crm.objects.contacts.read
crm.objects.contacts.write
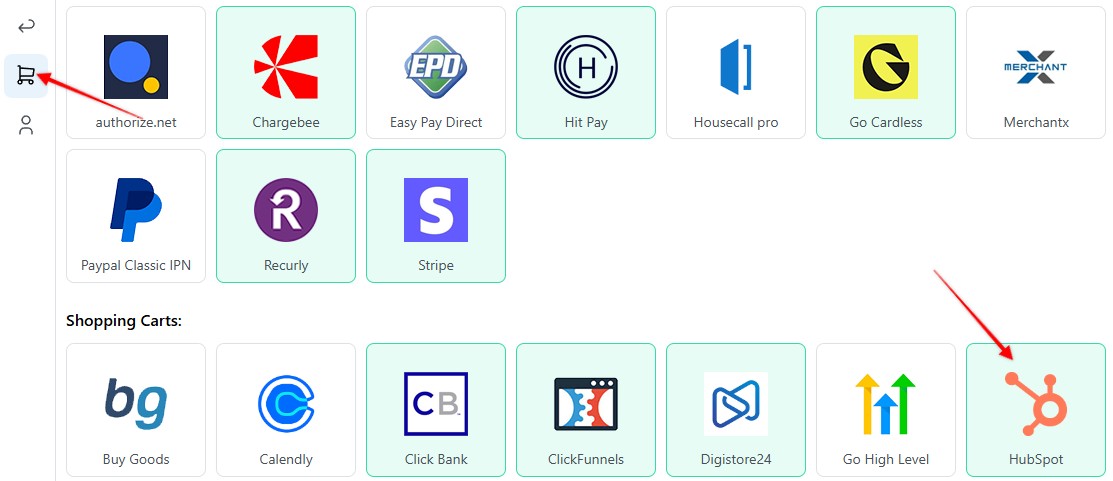
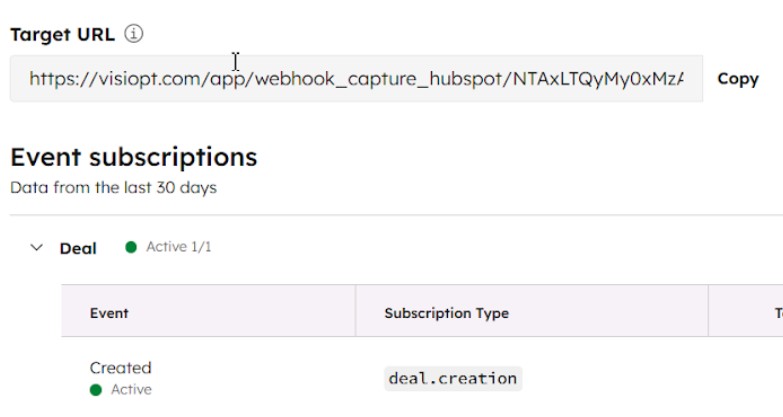
6. Create a new webhook for HubSpot in Visiopt. Go to the Settings page > Payment processing and carts > HubSpot.
7. After clicking the "Save & generate webhook URL", copy the generated URL.
8. In HubSpot, in the Webhook tab, paste your webhook URL (the one you copied from Visiopt) then click Commit Changes. After committing, click Continue Creating.

9. Click “Continue Creating”.
10. The webhook setup is now complete — you can see it successfully configured.
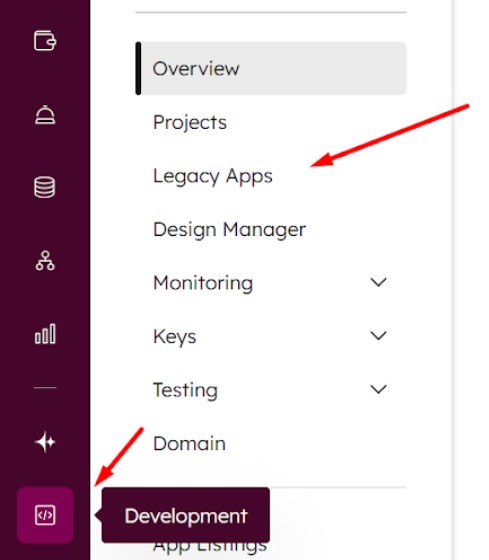
11. To get the HubSpot webhook access token, navigate to Development, then select Legacy apps. Under Legacy apps, select your app and click on Auth, then copy the access token.

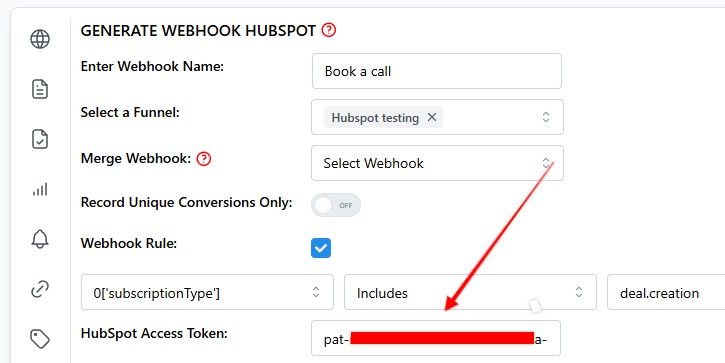
12. Navigate back to Visiopt webhook setup, paste the access token and save.
Setting Up Multiple Webhooks for HubSpot Actions
You can track any HubSpot actions you want from a booked call to a completed sale directly inside Visiopt.
To keep your data clean and accurate, follow these simple setup rules:
Step 1: Create a Separate Webhook for Each Action
Each unique action (e.g., Book a Call, Purchase, Lead Moved to Closed Won) requires its own webhook.
This ensures each event is tracked independently.
Example:
- One webhook for Book a Call
- Another webhook for Sale Customer
- Another (optional) for Demo Scheduled, Refund Issued, etc.
Step 2: Add Webhook Rules to Filter the Right Events
Inside each webhook, define Webhook Rules that tell Visiopt when to trigger the webhook.
Rules let you capture only the specific HubSpot event or property change you care about.
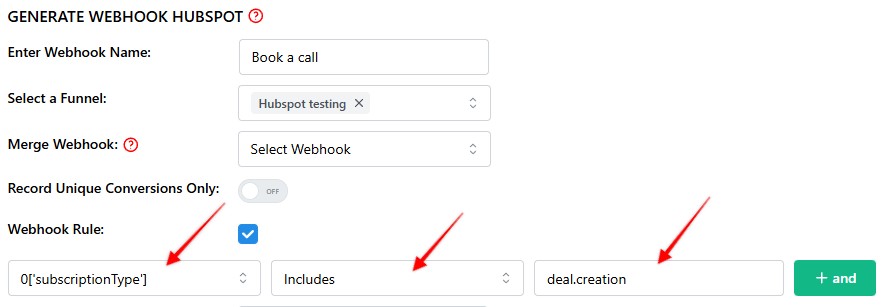
Example: Book a Call:
- Webhook Name: Book a Call
- Webhook Rule:
- Field:
subscriptionType - Condition:
Includes - Value:
deal.creation
- Field:
Fires when a new deal is created — for example, after a call is booked.
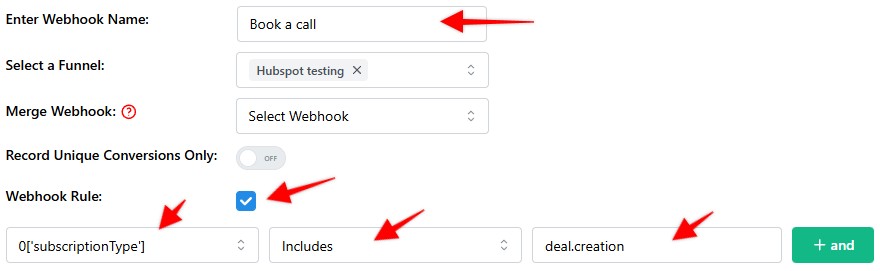
Note: this is for demonstration purposes only. Yu must set webhook rules that match your account setup.
Example: Sale Customer:
- Webhook Name: Book a Call
- Webhook Rule:
- Field:
subscriptionType - Condition:
Includes - Value:
closed_won_reason
- Field:
Fires when a deal moves to Closed Won, tracking confirmed customers.
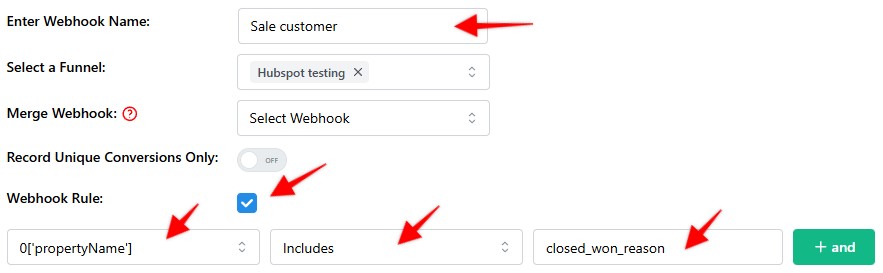
Note: this is for demonstration purposes only. You must set webhook rules that match your account setup.
Tip: Customize for Your Account
Your exact rules will depend on your HubSpot setup and the actions you want to track.
If you’re unsure which property or event applies, check your HubSpot workflow or ask your Visiopt success manager for guidance.
NOTE: For each webhook you set up in Visiopt, you must create a separate app in HubSpot - one new app per webhook.
Comments
0 comments
Please sign in to leave a comment.